Create a student, assessor or employer
To create a new student, go to: https://study.link.edu.au/wp-admin/user-new.php
Please ensure the Send User Notification box is not checked and their Role is “Subscriber” (default settings).
Use the same process to create an assessor or employer, setting their Role to “Group Leader”.
Create an employer group
A group is typically used to organise students by an employer.
Students and Group Leaders can be members of multiple groups and sub-groups.
To create an employer group, go to: https://study.link.edu.au/wp-admin/post-new.php?post_type=groups
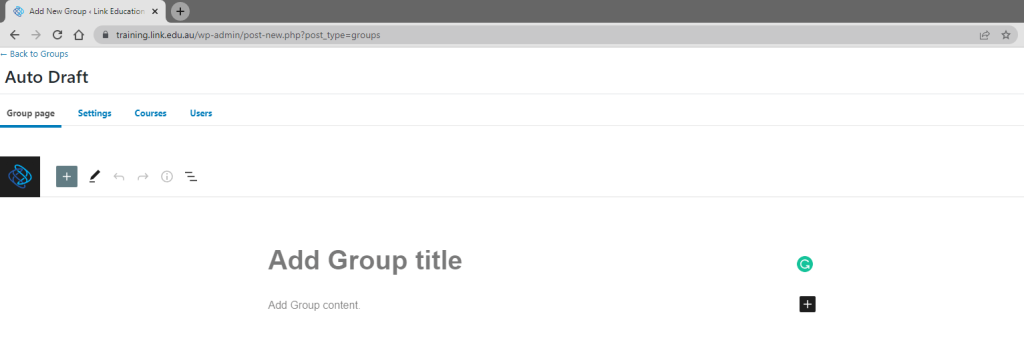
Group Title
Your group title is the first thing you’ll see at the top of the editing screen. Look for a placeholder that says “Add Group title.”
The title should include the course and the employer’s name; for example: OPEN – TasWater
If required, you can add a description of the group where it says “Add Group content”.
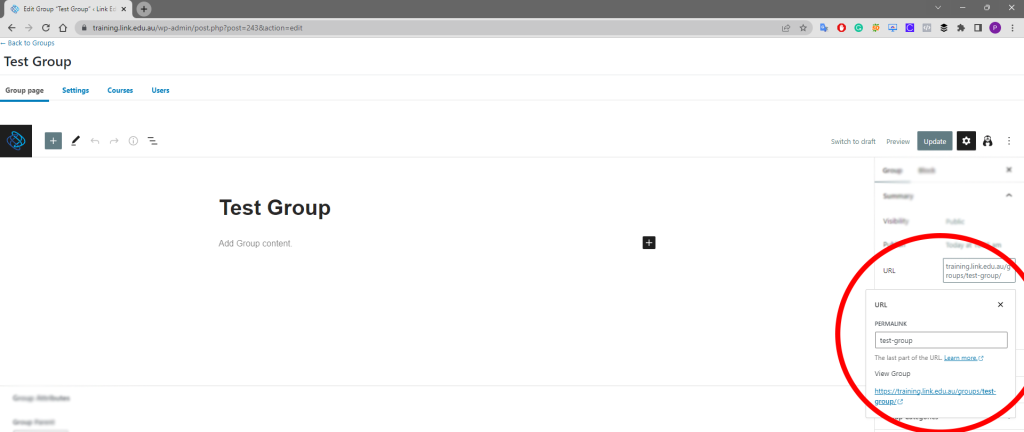
Group URL
By default, the group title becomes the URL for the group.
The first two parts of the URL are not editable but are determined by (part 1) our site’s domain name study.link.edu.au and (part 2) the group slug you have chosen (which will be /groups/, unless you customized your LearnDash permalinks).
You can edit the third part of the URL:
In most cases, this should be the same as your group title.
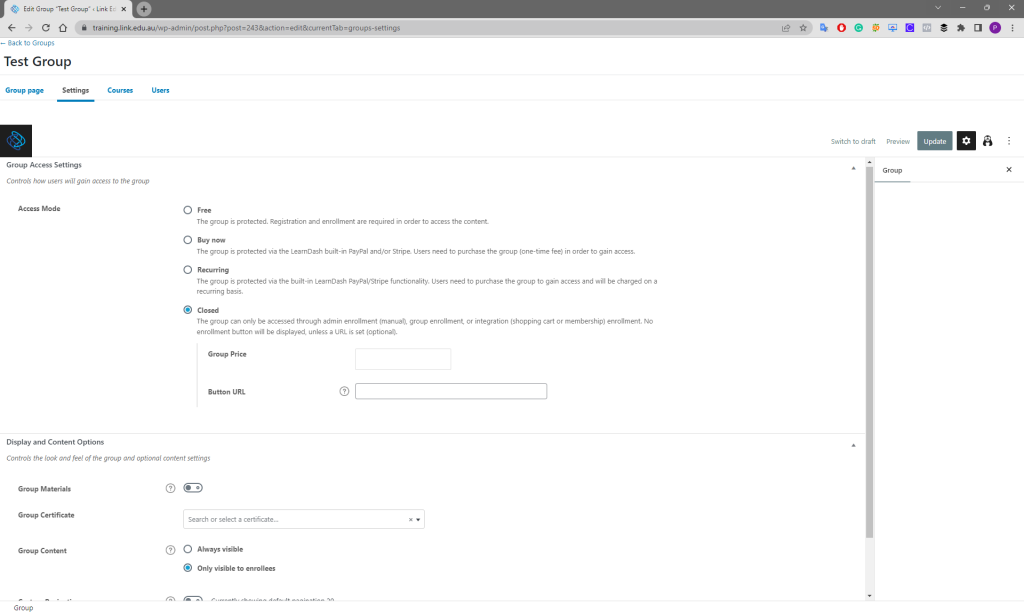
Group Settings
On the group settings tab, change the following settings:
- Access Mode – change from Free to Closed
- Group Content – change from Always visible to Only visible to enrollees
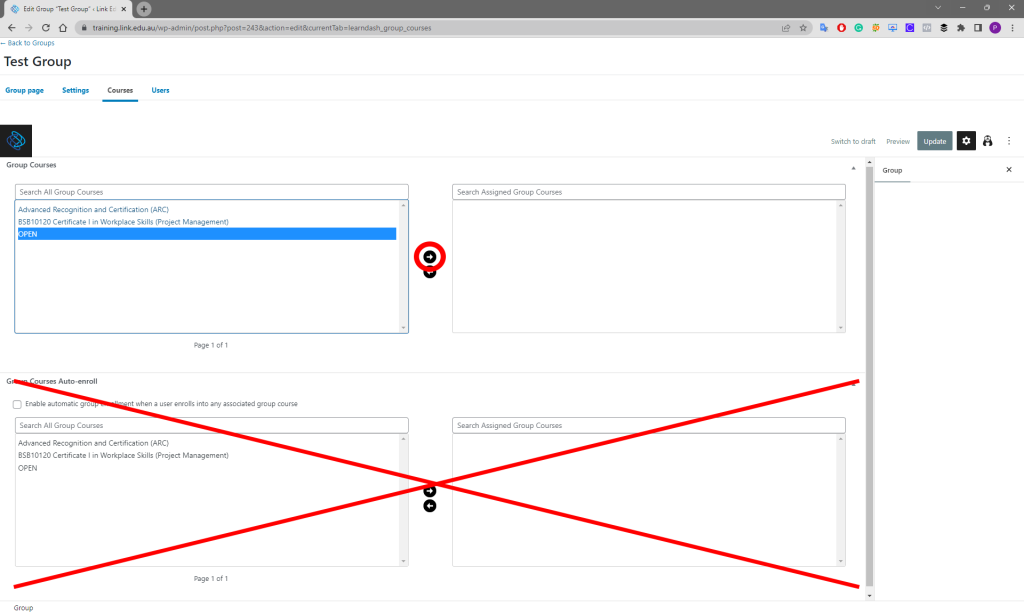
Group Courses
On the Courses tab, add the relevant course to the Group.
Only add one course per group to ensure students do not get access to courses they are not enrolled in.
DO NOT set up Auto-enroll (either automatic or manual) for Groups.
Enrol a student in a course and group
To enrol a student in a course, search for the student at: https://study.link.edu.au/wp-admin/users.php
Click on the student’s name to edit their profile.
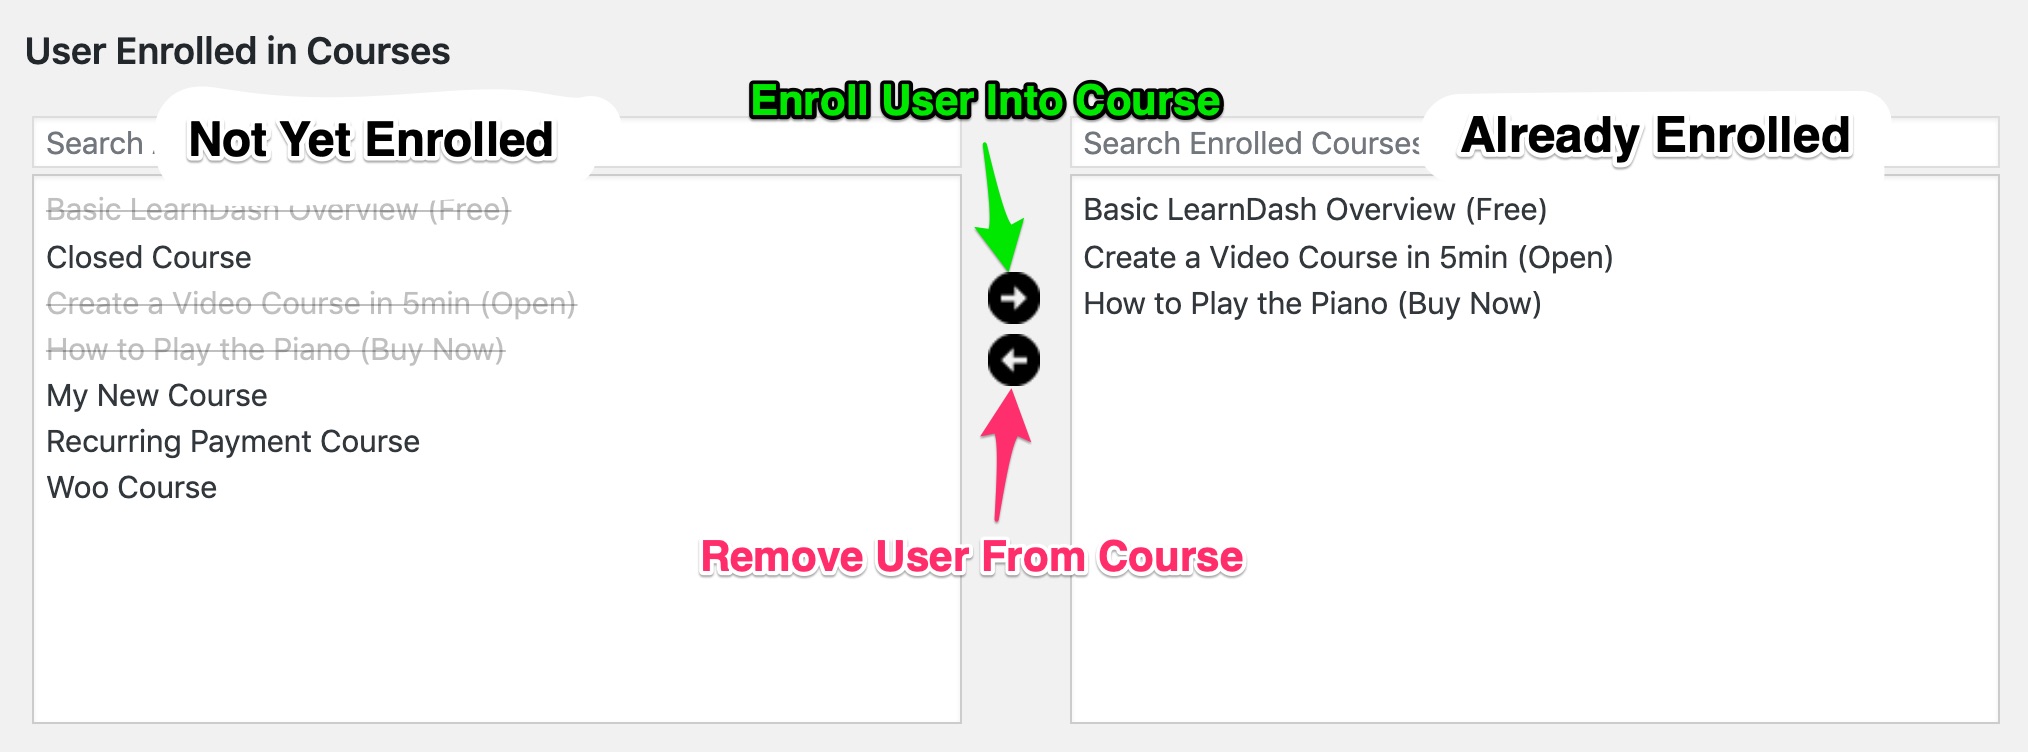
User Enrolled in Courses
This section lets you see which courses the user is currently enrolled in. You can also enrol users into a course(s) or remove them from currently enrolled courses.
To enrol a user into a course:
- Click the course on the left that you’d like to enrol them in
- Click the right arrow to move that course into the ‘Already Enrolled’ window
- Click the Update Profile button at the bottom of the page
To remove a user from a course:
- Click the course on the right that they are already enrolled in
- Click the left arrow to remove that course from the ‘Already Enrolled’ window
- Click the Update Profile button at the bottom of the page
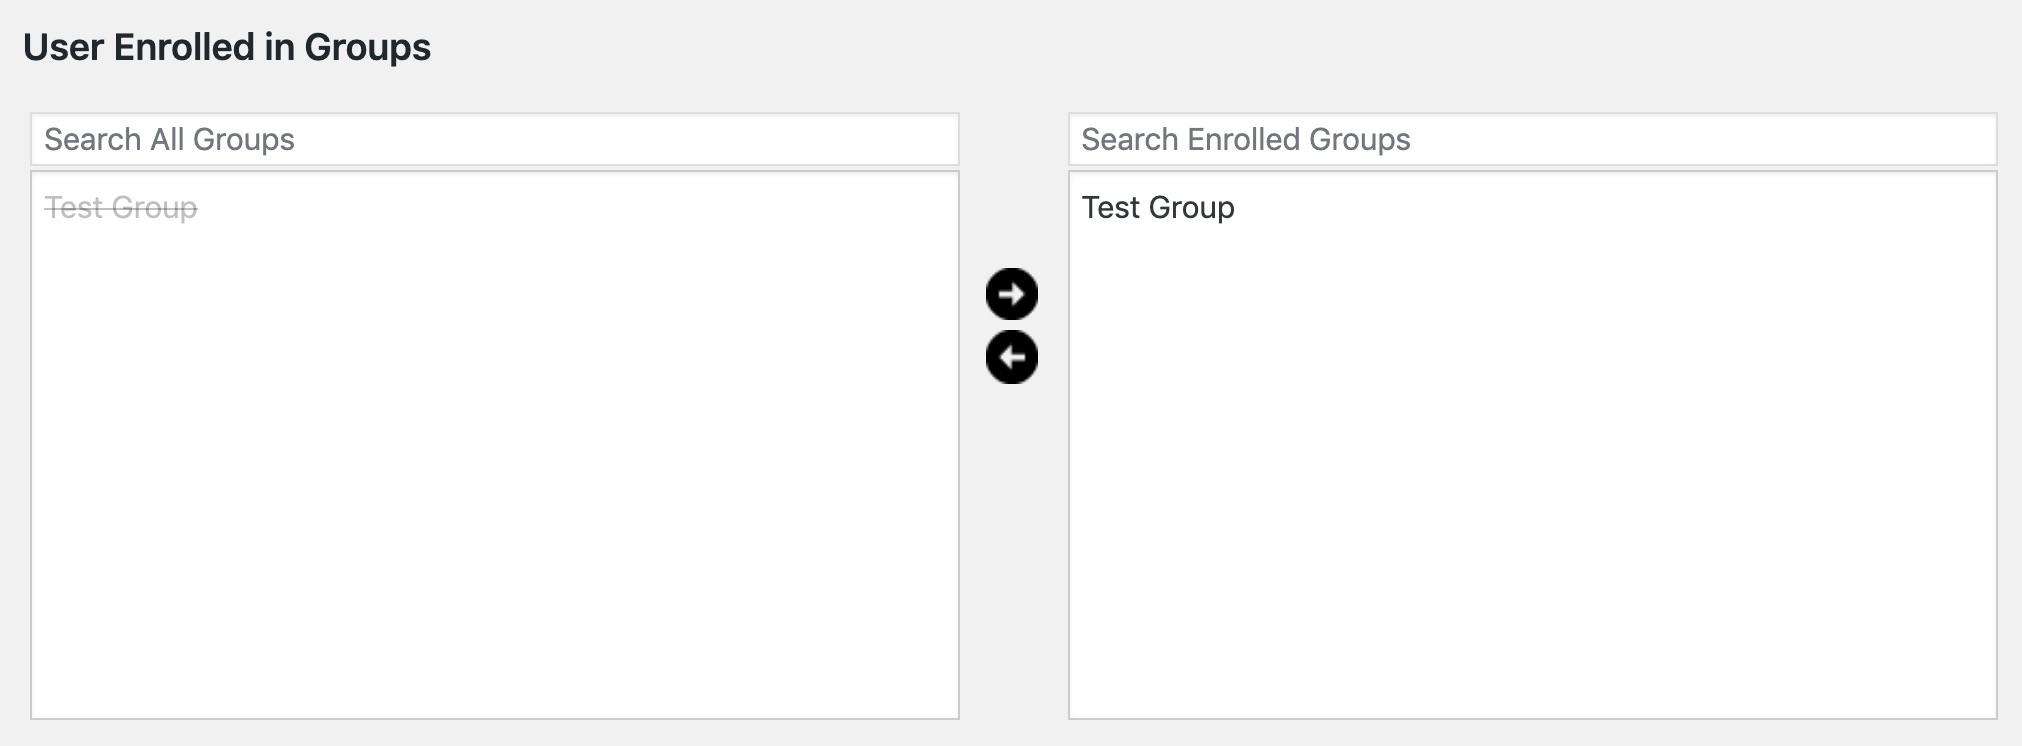
User Enrolled in Groups
This section works in the same way as above, only for groups instead of courses.
- Left Side: You have created these groups, but the user is not yet a member.
- Right Side: These are the groups in which the user is already a member.
Use the arrows in the middle to add or remove this user from a group.
All students should be enrolled in the general group for their course. An additional employer group should be added, if required.
While you are here, you should also:
- Update their profile picture with the photo they provided with their enrolment
- Manually mark OPEN complete, if relevant (see below).
Add an assessor or employer (Group Leader) to a course
Assessors and employers are known as Group Leaders in Link. By default, creating a user as a Group Leader adds the ability to…
- view reports on course progress for any user in the group
- view reports on quiz performance for any user in the group
- send email messages to the entire group
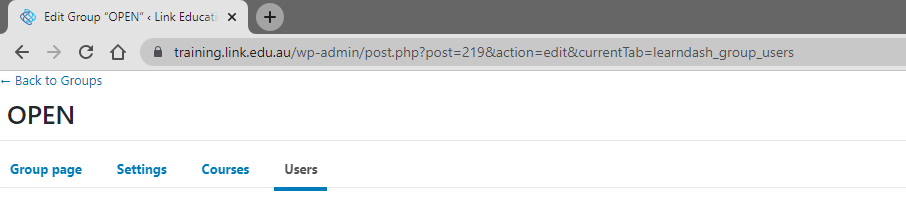
To add a Group Leader to a course, go to: https://study.link.edu.au/wp-admin/edit.php?post_type=groups
Select (Edit) the course you want and navigate to the Users tab at the top of the page.
Assigning a Group Leader to a Group
Once your Group Leader(s) have been created, you must assign them to the group. There are no limits on the number of Group Leaders that can be assigned to a group, but it must have at least one.
Assigning a Group Leader to a group is the same process as assigning courses.
- Scroll down to Group Leaders
- Choose the user(s) you want to add as Group Leaders by clicking on their name. Hold
CTRL(CMDon Mac) to select multiple courses at once. - Click the right arrow to move the user into the Assigned Group Leaders window
NOTE
A single Group Leader can oversee multiple groups.
Manually mark a course, lesson or topic (in)complete
To manually mark a lesson or topic (in)complete, search for the student at: https://study.link.edu.au/wp-admin/users.php
Click on the student’s name to edit their profile.
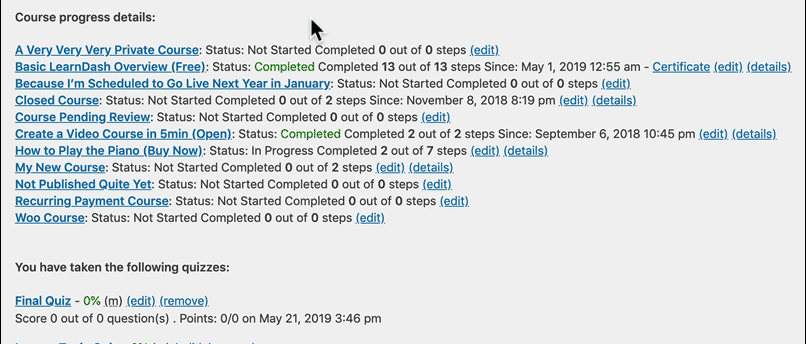
Course Progress Details
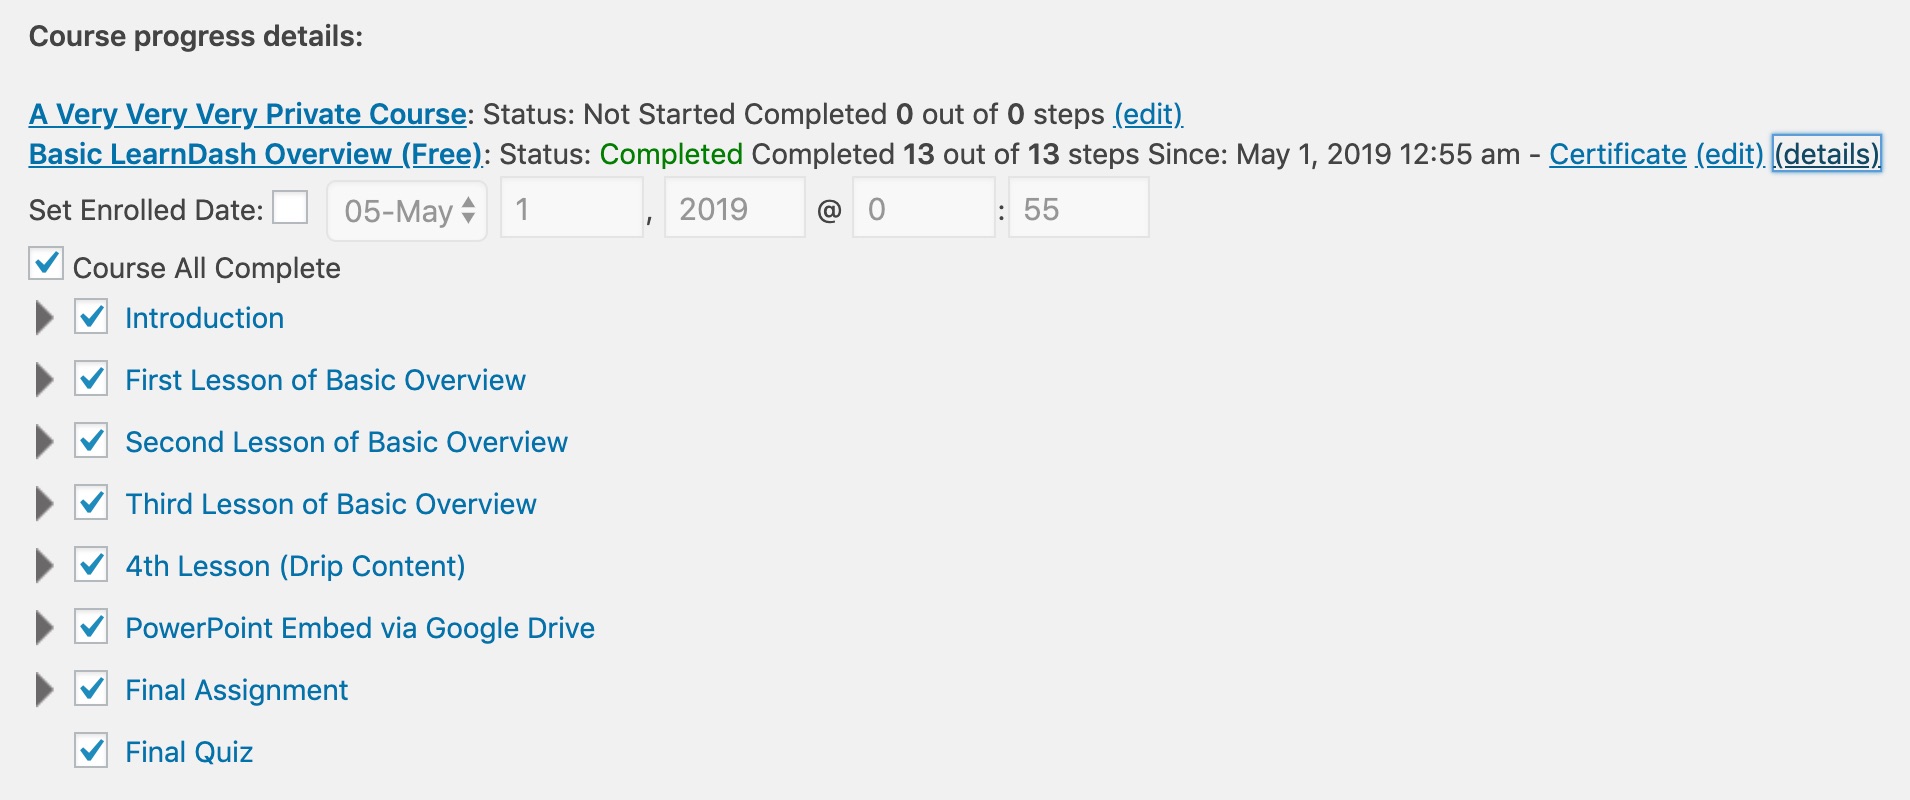
This section lists all the courses that the user is currently enrolled in. For each course, the following information is provided:
- Name of the course (with a link to view the course page)
- Course Status: Not Started, In Progress, Completed
- X of Y steps completed
- A link to edit the course (assuming you have the correct permissions to do so)
- A “details” link to view more information about course steps & enrollment date
Clicking on the “(details)” link will display additional information about the user’s access & progress in the course.
Enrollment Date
The date & time that a user enrols into a course is captured and stored by LearnDash. This can be used to limit course access to a certain number of days or drip feed lessons at a specified interval, starting from the date the user enrols.
The original enrollment date is listed but greyed out by default. To update the user’s enrollment date for that course:
- Click on (details) at the end of the course name list
- Make sure to click the checkbox after Set Enrollment Date
- Update the enrollment date
- Click the Update Profile button at the bottom of the page
If you’ve set your course to expire after a certain number of days, this new enrollment date will automatically take effect, and the user’s course access will be updated.
NOTE
The Set Enrollment Date option isn’t available when a user is enrolled into a group.
Mark Steps Complete/Incomplete
If you need to change the status of a lesson, topic or quiz for one of your users, you can do so from the user’s profile. As an administrator, you can simply mark any course step as complete or incomplete by using the checkboxes.
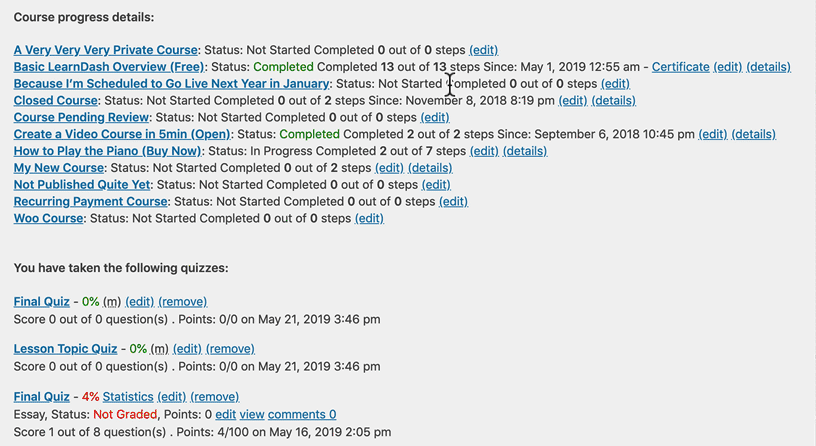
- Click the “(details)” link to view course steps
- (optional) Use the arrows on the left to view topics/quizzes beneath a lesson
- Check or uncheck a box next to any lesson, topic or quiz
- Click the Update Profile button at the bottom of the page
This will instantly change the status of that course step for the user.
Change an approved assignment to unapproved
If an assessor accidentally marks an assignment as approved, they cannot reverse this action and will need to contact admin.
You should contact Josh for help with this.
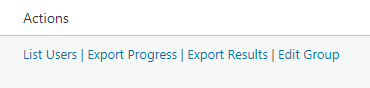
Prepare employer reports
To prepare an employer report, go to: https://study.link.edu.au/wp-admin/admin.php?page=group_admin_page
Choose the action for each employer group that is relevant to the report you wish to produce.
Graduate a student
When graduating a student, remove them from any employer groups by reversing your actions to enrol them (above).
Leave them in their general group and course for continued access.